Wednesday, September 6, 2017

Spring Fling in the fall


 I've been working on the Spring Fling bag by Janelle MacKay. It was my first time to use fusible foam in a bag. Great stuff for great support.
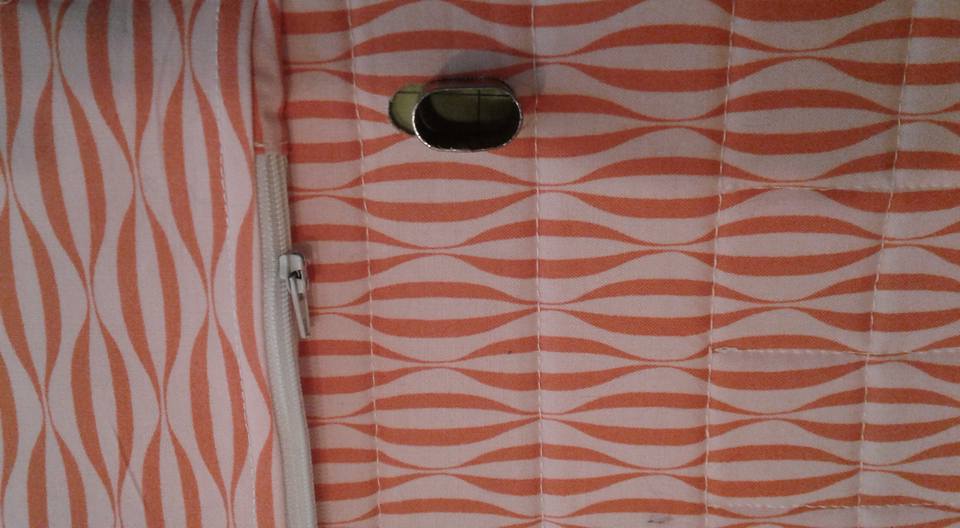
Making the hole for the turnlock.

 It was also the first time I got to use one of my new hole punches. It's hard to cut out the hole for the turnlocks, so I heard through an online bag making group about these leather punches. Love them, I used for two sets of holes in this bag.

Turnlock keyhole installed.


 The second set of holes were a little trickier as none of the hole punches were exactly the right size. So I used one that was the right width, but shorter length than needed. I traced the oval from the hardware needed and punched it out in two spots. Worked well.

I hadn't installed one of these in before, but easy as can be. Easier than getting the little screws in on the turnlocks!
All done! These are for the handles to come through from the other side...pretty tricky!

 I have to admit, sewing the binding to the gusset area was a bit tricky. Love the binding clips for bag making. It's so much better than pinning. I basted the gusset in before I sewed the bias binding on.


I really like this color combo and the gray woven was a dream to work with. I hand sewed the binding on the second side. No way was I going around those gussets on the machine again.
It's on display at Cut Up and Quilt now, so look for it the next time you are in shopping. 

I've been working on a second Traverse Bag by Noodlehead. Love how it's turning out so far, though I had some problems with the top stitching yesterday. Hope to finish it today, but first some cleaning!

No automatic alt text available.

Sunday, September 3, 2017

A great dresden finish!

 I met on Thursday with a group of quilters that are fairly new to quilting (3rd project for most) and doing a great job! The first time we met to make the Dresden Plate Special they learned how to cut out the blades, make the nice sharp points, then begin to sew the blades together. Their homework was to finish sewing the blades together so that they could sew them to the background sq. when we met again. They came back prepared and ready to sew! Two of the quilters had made another version of the top in the 2 weeks between classes.

Lorraine is using soft florals for this project.

Anita fussy cut a flower for her center.

Trish's happy summery topper

Trish's 2nd Christmasversion
Mary Ann's first quilt project

Linda made 2 identical dresdens

Marguerite's fall beauty
Pat was unable to come on Thurs. so will make up this class later in the month. I will update this post then. This is her progress from the first class.

Pat's dresden blades
I'm excited to see what these quilters do next!

I started working on a store model of the the Spring Sling by Janelle MacKay the other day and hope to finish it today. It's been fun so far and I'm excited to get it finished. It's my first time using fusible foam interfacing and I love it for this project so far. 
I also got to use one of the hole punches that I recently purchased to cut the turnlock hardware hole. So much easier and neater than cutting out with a scissors. I should've taken a pic after the punch...sorry. I will next time!
I still sometimes have trouble getting the screw holes made without making them too big. Any tips?
 Heading to the sewing machine now. Have a great Sunday!


Thursday, August 31, 2017

Traverse Bag and class stuff


I really like Noodlehead bag patterns. Very good instructions, diagrams and listing of needed items. Cut Up and Quilt asked me to make the Traverse Bag as a store model and I had fun using this canvas piece with many of the Cotton and Steele prints on it. I am still debating on whether I will teach a class on it or not. It depends on the interest. 

 I loved all of the prints, but wanted to have the houses front and center so used them for the flap that hides front pockets and snaps closed.
 The lining is the jacks in green, color isn't showing up great here.

 A back zipper pocket that was easy to install. Love it when I learn new ways to put in zippers and pockets.
 It's not a huge bag ( 12" x 9") but does have an adjustable cross-body strap, which is handy for shopping trips. I have enough canvas for another bag, which I will be making soon. I got more of the same lining fabric because I do love it. So they will be very similar. I'm making the 2nd one for a gift.
I have the second class today for the Dresden Plate Special, so I'm excited to see their dresden blades sewn together. Here are some pictures from their first class 2 weeks ago. I have made the dresden block with the curved blades too, but have to confess that I like the pointed blades the best for their ease in making. Stay tuned for more pictures from today's class!

No automatic alt text available.

No automatic alt text available.

No automatic alt text available.

No automatic alt text available.
The two gals above and below didn't shop together, but had some of the same fabrics!
No automatic alt text available.

No automatic alt text available.

No automatic alt text available.
I will be teaching this class again on Monday evenings beginning in Sept. So much fun and a great way to learn one of the ways to applique.
Image may contain: grass, plant, outdoor and nature
Dresden Plate Special

Wednesday, August 30, 2017

Bugsy Backpack fun and other updates


I recently made the Bugsy Backpack by Sassafras Lane Designs for a class model. What a fun and easy project. Loved this off point cityscape fabric and chose a blue grunge for accent fabric. Luckily you can buy a hardware kit so no searching for the correct size and types of hardware.

2 pockets
 It starts out pretty simply and basically is a big duffel bag with the zipper on the top instead of the side.
 The straps are attached under this cool flap...I used my lining fabric for it.
 Interesting way to sew in the zipper. I have learned so many different ways to sew in zippers making different bags by different designers. I know a lot of people are afraid of zippers, but they really aren't that hard to put in as a rule.
 Birthing the bag...always fun as you know you are almost finished!
 View of the top of the bag, which folds down to be in the front.
 Very roomy bag with two ouside pockets and an inside key fob.


This one is at Cut Up and Quilt as the class display model....I made another version out of this gorgeous border fabric that I have been wanting to use in just the right project.
 I matched up the print on the pockets or they would've covered up too much of the border print.

 Another birth! who else thinks this is fun! You have to close the two sides of the top/zipper edge and attach the loop and the hardware clip in the last step.

 I have another bag started to use during class to show all of the steps. I can't wait to finish it after the class Sept. 9. It's hard to know if the students will finish a bag during class, as some bags have so many steps, but since I'm offering a 2 hour cutting party the night before I have high hopes that they will. Once this bag is cut and interfaced, it goes pretty quickly.
  I retired from the school district in June and am excited to have more sewing time. I've been busy catching up at home and getting projects made for fall classes. All the classes are updated on my Upcoming Classes page here on the blog so stay tuned to see what I'm working on next. (it really is fun being home doing this in the AM instead of going to work!)